MB-339 Basic Course (DCS)
Settings
2. Axis Setting
First you should select the Axis Commands section above or press the AXIS ASSIGN button (bottom center). Both will switch to the list of actions you can put on any analog axis (joystick or throttle). Each control device is displayed as a separate column, while the actions are displayed as rows (see screenshot below). The listed input devices are of course named differently for your controls.
There are certainly some strange assignments in it at the start. It is often easiest to delete all of them and start from scratch.
To delete all assignments, select one column (e.g. on the screenshot Saitek Pro Flight) and delete the whole column with Delete category.
By clicking twice on a cell (intersection between row and column), you can assign an axis.

You should assign the following axes:
| Action | Description | Comments |
| Flying: control stick, aileron | roller Axis - Aileron | Recommendation: Curvature 15 |
| Flying: control stick, elevator | Pitch Axis - Elevator | Recommendation: Curvature 15 |
| Rudder | Yaw Axis - Rudder | Recommendation: Curvature 0 - 10 |
| Flying: Thrust | Thrust | Controls the power of the engine, Curvature 0 |
| Wheel Brake Left / Right | To brake with the pedals | Optional: If you have rudder pedals with brake axes, you should use them. Alternatively you can brake with a button. |
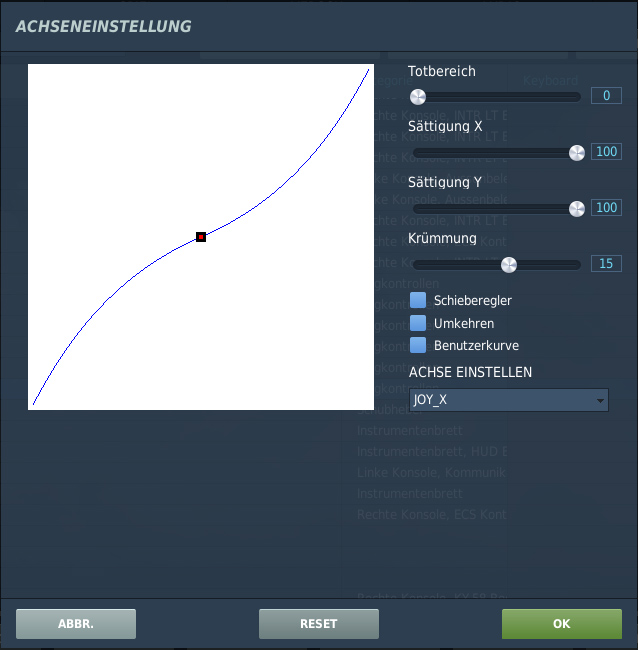
To adjust the sensitivity of the occupied joystick axes, open the dialog AXIS TUNE. with the AXIS TUNE button.
In the following pictures I will show you the curvature setting I have set for each axis. In the order: Thrust - Aileron - Elevator - Rudder) as a recommendation:


