Settings
| Site: | Open Flight School |
| Course: | Su-25T trail course (DCS) |
| Book: | Settings |
| Printed by: | Guest user |
| Date: | Wednesday, 11 February 2026, 1:11 AM |
1. Initial Settings
Before we get started, let's have a quick look at the options of DCS together.
You should first have a look at the details of the options in the course General Basics (DCS) under Settings of DCS read.
The following pages describe the settings required for this course. These are mainly the controls and special settings. It is assumed that you know how to change the assignments. If this is not the case, please read the course General Basics (DCS), particularly the Control chapter before continuing.
- Click on the gear in the main menu to open the options:

-
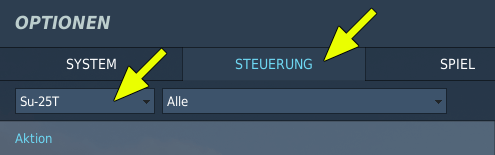
Select the tab CONTROL and then select MB-339PAN from the drop down menu at the top left.
-
Continue with the instructions for assigning the axes and then the keys (see following pages).
2. Axis Setting
First you should select the Axis Commands section above or press the AXIS ASSIGN button (bottom center). Both will switch to the list of actions you can put on any analog axis (joystick or throttle). Each control device is displayed as a separate column, while the actions are displayed as rows (see screenshot below). The listed input devices are of course named differently for your controls.
There are certainly some strange assignments in it at the start. It is often easiest to delete all of them and start from scratch.
To delete all assignments, select one column (e.g. on the screenshot Saitek Pro Flight) and delete the whole column with Delete category.
By clicking twice on a cell (intersection between row and column), you can assign an axis.
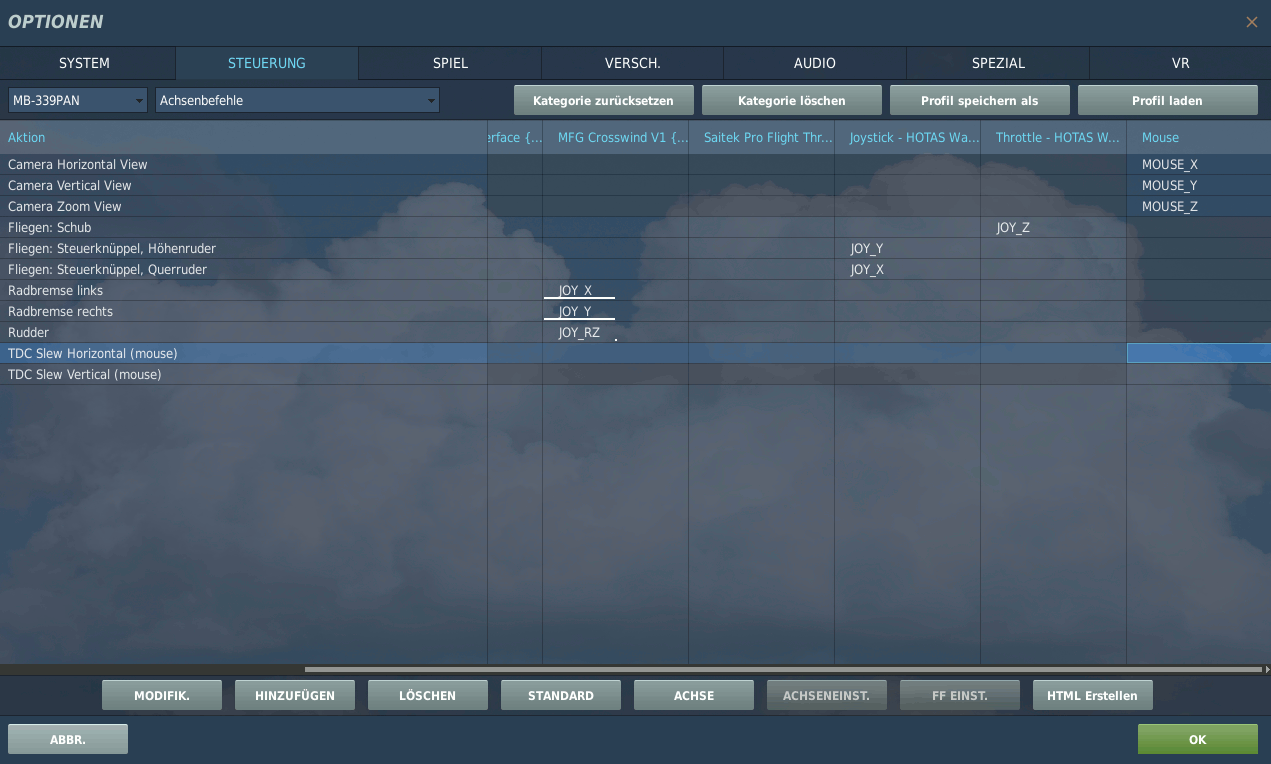
You should assign the following axes:
| Action | Description | Comments |
| Flying: control stick, aileron | roller Axis - Aileron | Recommendation: Curvature 15 |
| Flying: control stick, elevator | Pitch Axis - Elevator | Recommendation: Curvature 15 |
| Rudder | Yaw Axis - Rudder | Recommendation: Curvature 0 - 10 |
| Flying: Thrust | Thrust | Controls the power of the engine, Curvature 0 |
| Wheel Brake Left / Right | To brake with the pedals | Optional: If you have rudder pedals with brake axes, you should use them. Alternatively you can brake with a button. |
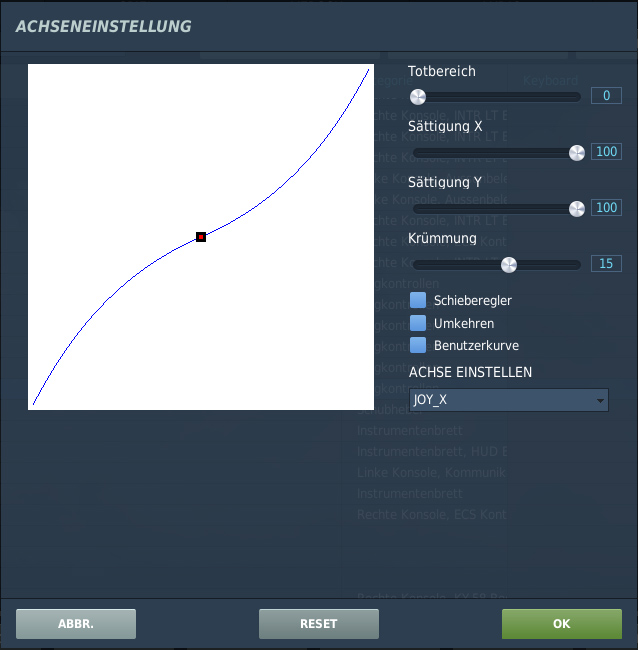
To adjust the sensitivity of the occupied joystick axes, open the dialog AXIS TUNE. with the AXIS TUNE button.
In the following pictures I will show you the curvature setting I have set for each axis. In the order: Thrust - Aileron - Elevator - Rudder) as a recommendation:


3. Key Assignment
 From the startup procedure to the shutdown, only a few more keys are needed in the basic course.
In general you should keep the standard assignment and extend it with unused functions according to your wishes.
You can adjust the settings according to your needs or put them on joystick buttons or other axes (e.g. rudder pedals), but you have to know them during the mission.
A key combination is represented in this course as:
- A default key combination is displayed as follows: LShift + F
- Sometimes it is necessary to set up additional key combinations. These are then displayed in this way: LCtrl + L
The following keyboard layout is required:
| Action | Description | Standard assignment |
| Wheel Brake On/Off | Full Braking of Both Wheels | |
| Gear Retraction/extension | Changes between Retracted and Extended gear. | |
| Communication Menu | Opens the basic Radio Menu. | |
| Landing Flaps Extend |
Extends the Flaps one step. | |
| Landing Flaps Raise | Retracts the Flaps one step. | |
| Steer On/Off | Switches the Nose Wheel Control On. | |
| Air Brake |
Extend/Retract the Airbrake. | |
| Engines Stop Toggle |
Toggles the Thrust Lever between STOP and IDLE. |
There are many more keyboard commands, but you can control all switches in the cockpit with the mouse. So this should be enough for this course.
4. MOD for english Cockpit
 Die Su-25T wird nur mit einem russischen Cockpit in DCS World ausgeliefert. Das macht es für Anfänger noch schwerer sich im Cockpit zu orientieren.
Zum Glück gibt es ein englisches Cockpit MOD. Wir beschreiben hier wie du es installierst.
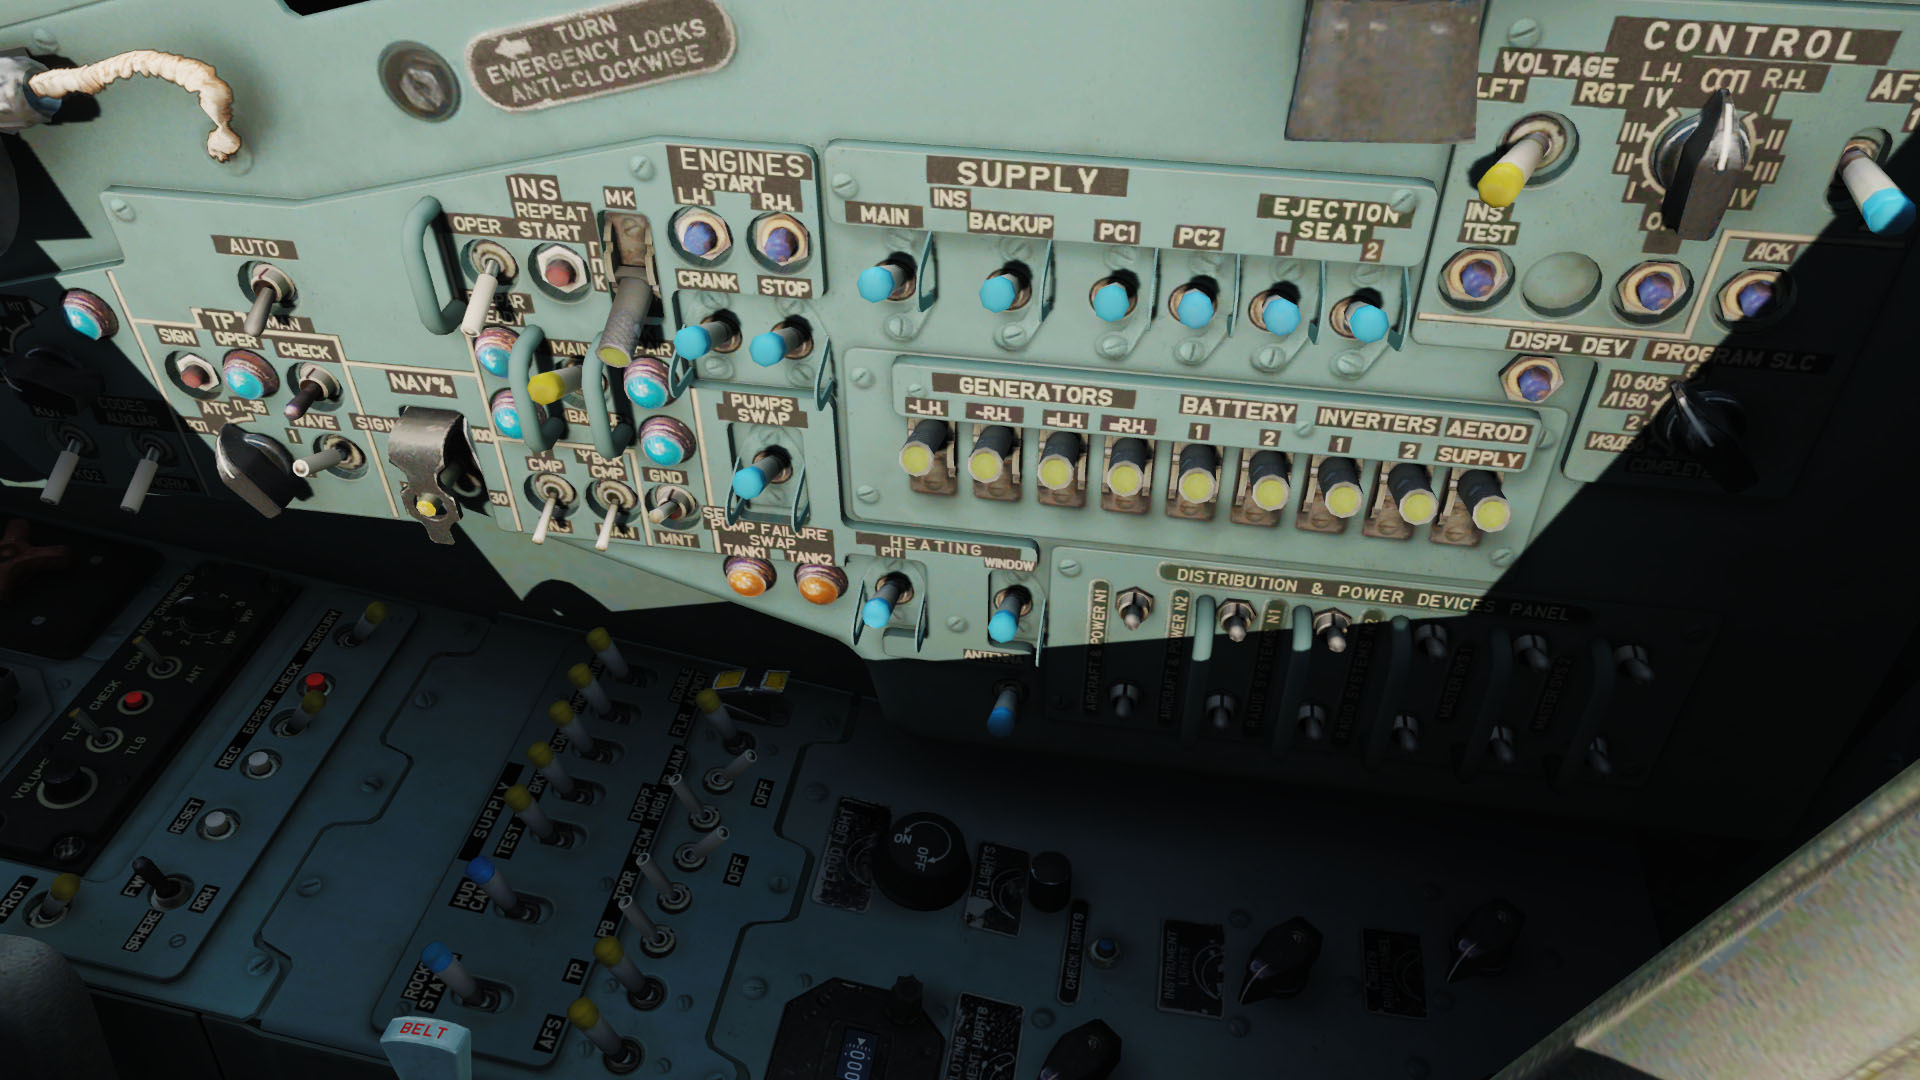
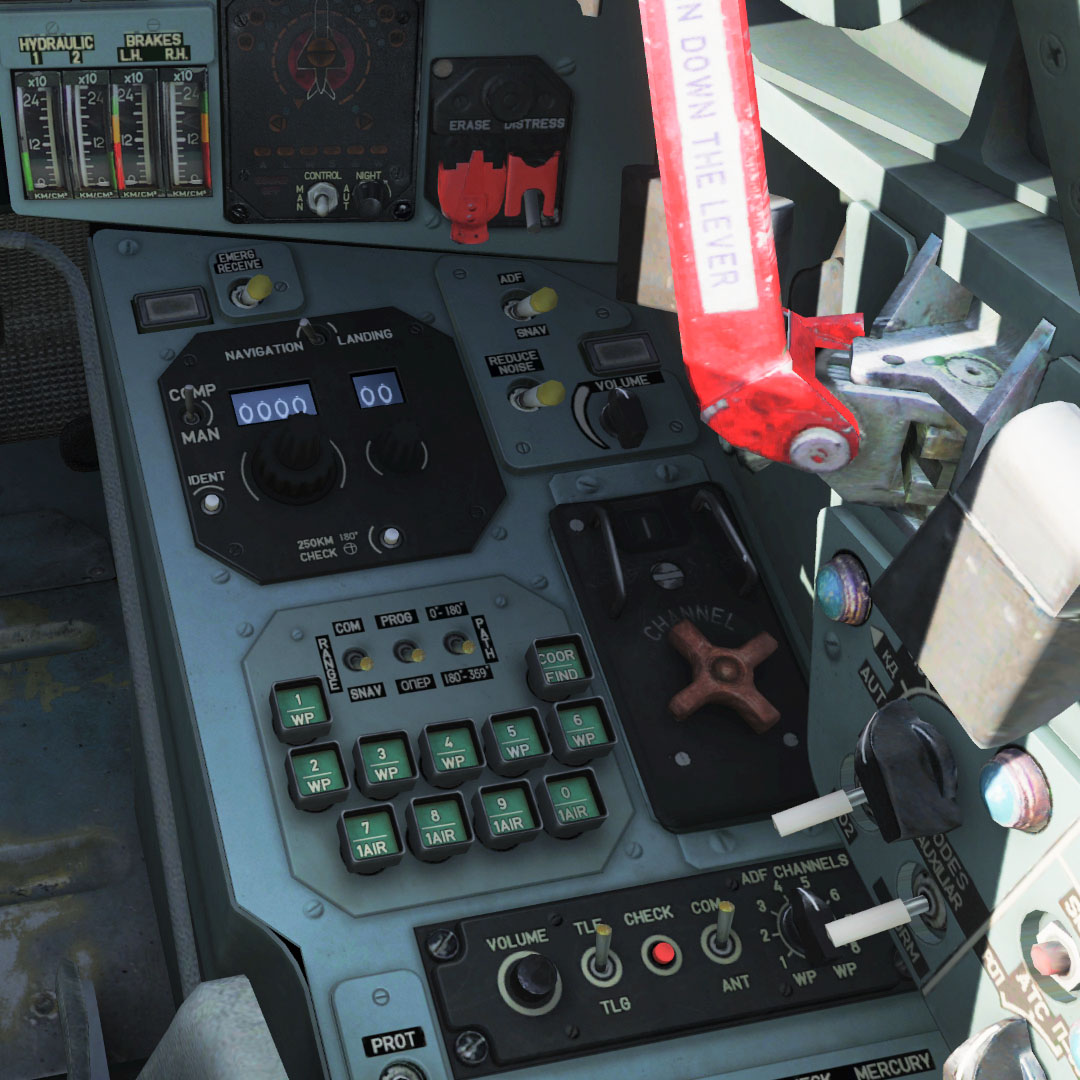
Aber auf allen Screenshots in diesem Kurs verwenden wir das englische Cockpit.
Folgende Schritte musst du durchführen um die Modifikation zu installieren:
- Lade die Datei zunächst von der DCS-Webseite herunter: https://www.digitalcombatsimulator.com/en/files/722567/
- Entpacke die Datei Devrim_SU-25T_EnglishCockpitMod_v1.6.zip an einer beliebigen Stelle auf deiner Festplatte.
- Kopiere folgenden Pfad in ein Explorer-Fenster: %USERPROFILE%\saved games und drücke Enter.
- Du befindest dich jetzt unter C: > Benutzer > Gespeicherte Spiele. Dort öffnest du deinen DCS bzw. DCS.openbeta Ordner.
- Kopiere den Odner Liveries aus dem entpackten Zip in den DCS Ordner und überschreibe den bestehenden.
- Wenn du den Ordner Liveries öffnest hast du einen Unterordner mit dem Namen Cockpit_Su-25T.
- Im Zip befindet sich ein Odner HUD Glass mit einigen Unterordnern. Enthalten ist immer die gleiche Datei (su25t-cpt-hud-glass.dds).
Mit dieser Datei kannst du steuern wie das Head Up Display dargestellt wird. Kopiere die entsprechende Datei einfach in den Ordner ...\Liveries\Cockpit_Su-25T\English und teste welche davon dir am meisten zusagt. - Nun brauchst du das Cockpit nur noch in den Einstellungen auszuwählen (siehe nächster Abschnitt).
Wenn du das Cockpit wieder entfernen willst, lösche einfach den Ordner C:\Users\{your-user-name}\Saved Games\DCS\Liveries\Cockpit_Su-25T\English.
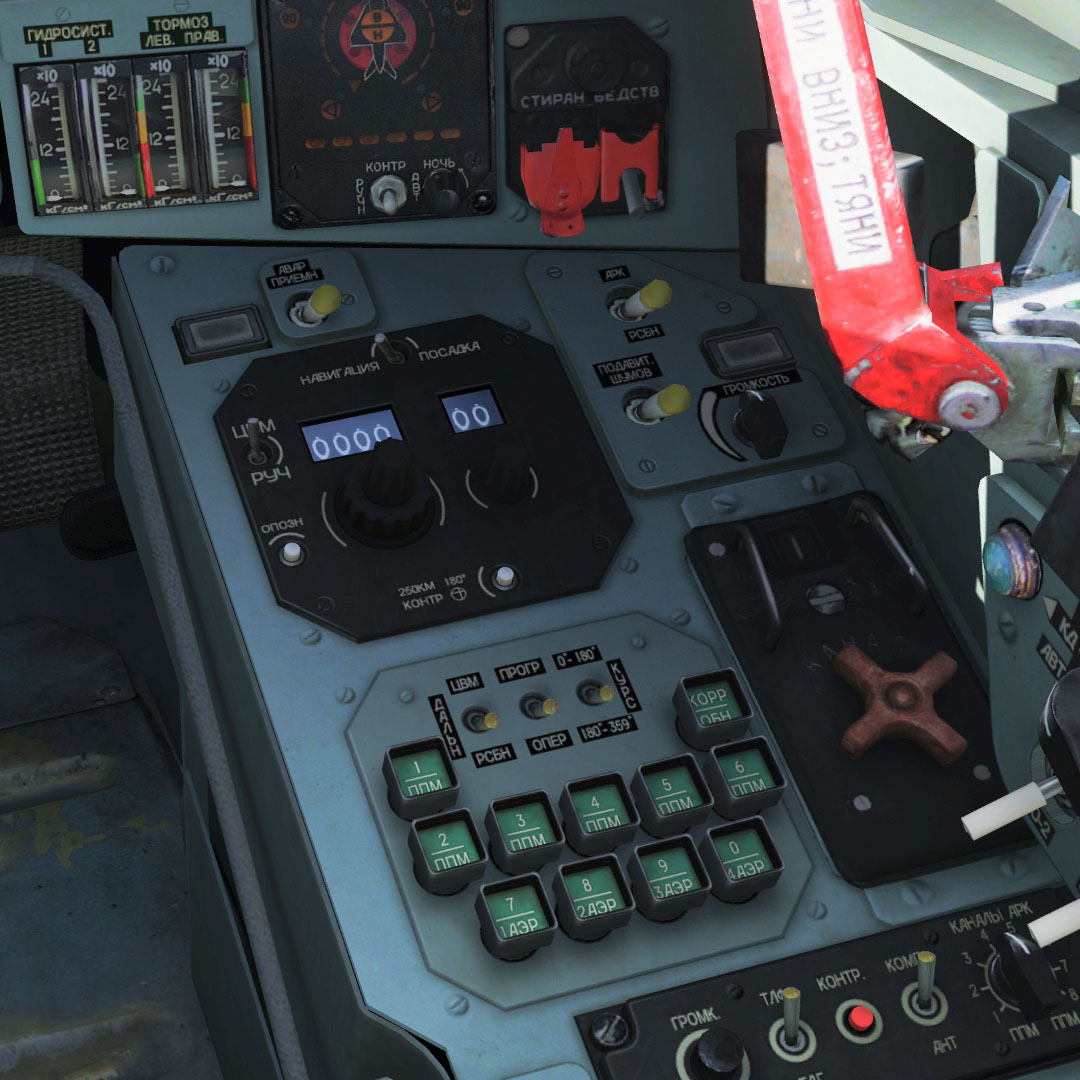
Hier der direkte Vergleich:
5. Special Settings
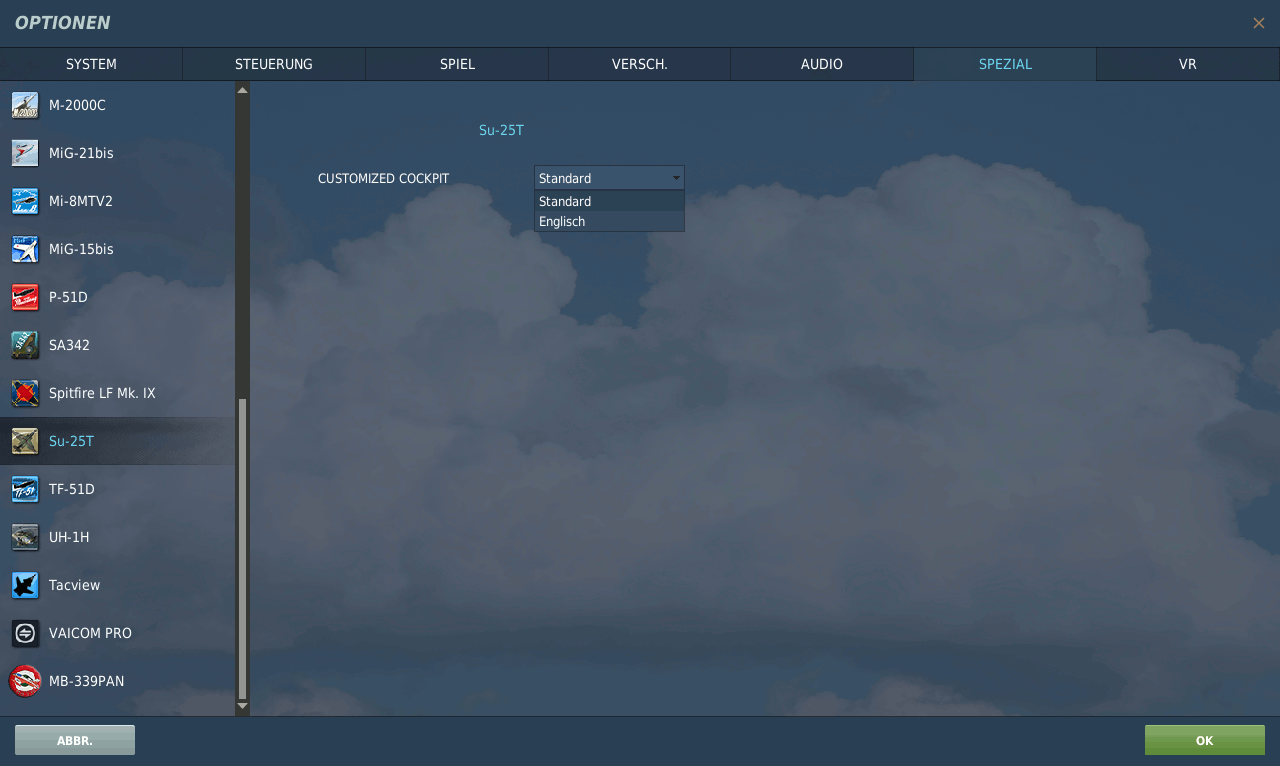
In den Spezialeinstellungen der Su-25T kann man nur das gewünschte Cockpit auswählen. Normalerweise steht hier nur der Eintrag Standard, der für das russische Cockpit steht.
Wenn du aber das englische Cockpit MOD installiert hast (siehe vorheriger Abschnitt), dann kannst du dort auch Englisch auswählen. In diesem Kurs verwenden wir das englische Cockpit bei allen Screenshots und Beschreibungen.